React
2018-02-28 小文字
背景
作为移动开发者,如何像专业前端一样开发前端应用? 过去了解一些HTML,JS就可以进行简单的页面开发和逻辑处理。现在通过React,前端开发变得更为其妙。
本文总结React开发前端应用的基本套路;
React是什么
首先要明确一点,React是一个js的library,用于前端页面开发,属于一个UI库。
React有什么用
既然React诞生是作为UI构建库,那么他的作用肯定是使得UI搭建更为简便,可用。
- Declarative 声明式
- Component-Based 基于组件
- Learn Once, Write Anywhere 无限制,可配合其他技术一同使用
创建React工程
创建一个React工程,最简便的方法是通过模板创建,模板工具可以提前通过npm安装,如下:
npm install -g create-react-app
现在通过create-react-app创建一个工程
create-react-app my-app
创建成功后,可以看到类似如下提示,告诉我们如何启用工程:
Success! Created my-app at /Users/aven/my-app
Inside that directory, you can run several commands:

  npm start
    Starts the development server.

  npm run build
    Bundles the app into static files for production.

  npm test
    Starts the test runner.

  npm run eject
    Removes this tool and copies build dependencies, configuration files
    and scripts into the app directory. If you do this, you can’t go back!

We suggest that you begin by typing:

  cd my-app
  npm start

Happy hacking!
模板工程内包含一个清单配置和源码信息:
aven-mac-pro-2:my-app aven$ ls
README.md	node_modules	package.json	public		src
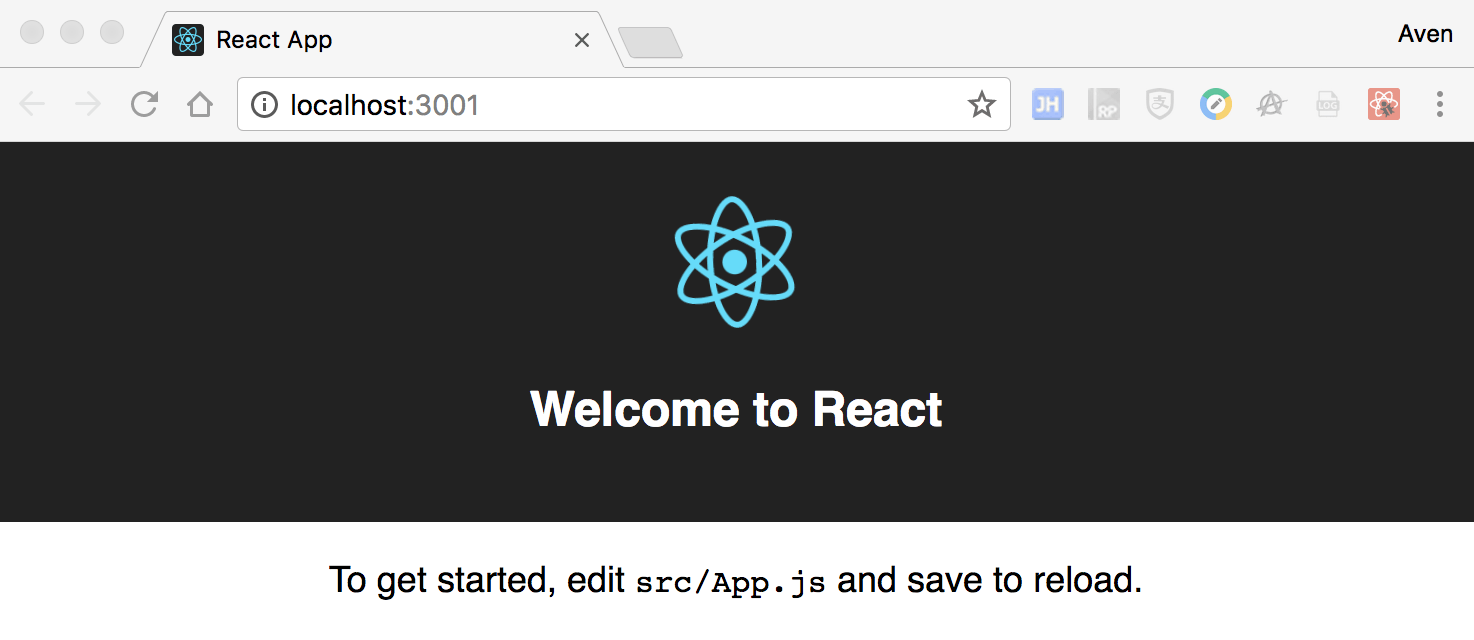
启动工程
现在启动模板工程看看效果
npm start

Compiled successfully!

You can now view my-app in the browser.

  Local:            http://localhost:3001/
  On Your Network:  http://10.252.231.92:3001/

Note that the development build is not optimized.
To create a production build, use npm run build.
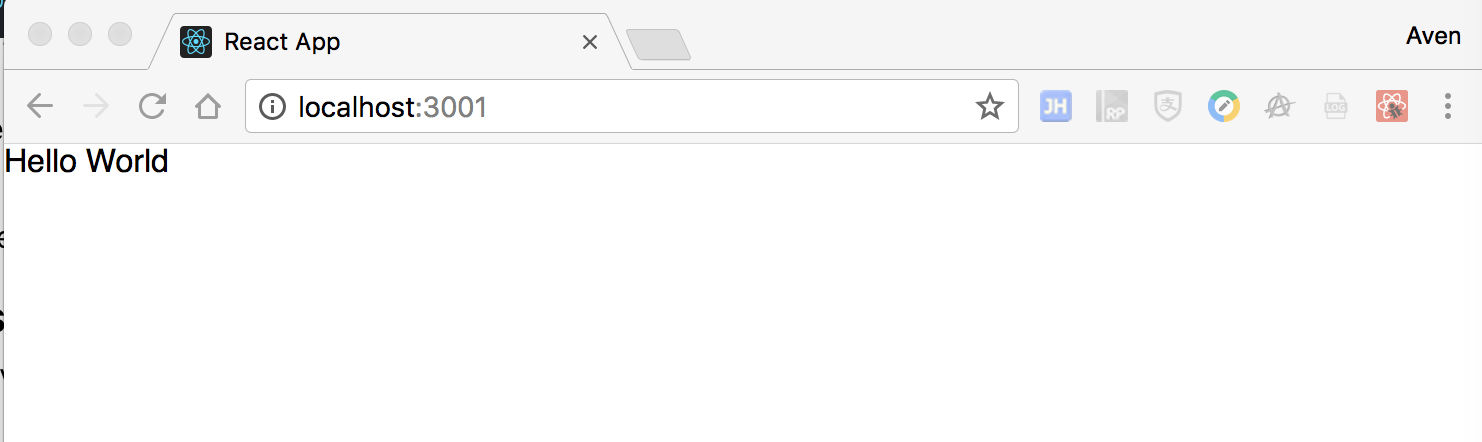
Hello World
刚才看到的效果是模板工程,现在我们把页面显示为Hello World
class HelloMessage extends React.Component {
  render() {
    return (
      <div>
        Hello {this.props.name}
      </div>
    );
  }
}
继承Component来定义HelloMessage组件,并实现render方法
接下来在index.js中修改为
import React from 'react';
import ReactDOM from 'react-dom';
import './index.css';

class HelloMessage extends React.Component {
  render() {
    return (
    <div>
      Hello {this.props.name}
    </div>
    );
  }
}

ReactDOM.render(<HelloMessage name="World"/>, document.getElementById('root'));