基于ReactNative重构工程模式
2019-05-16 小文字
背景
在跨端开发技术如火如荼的当下,很多技术团队都进行基础能力的储备和框架二次开发,在58同城,16年开始,我们基于Facebook的ReactNative技术栈,开发了WubaRN,并在公司内部推广,当然这都不是本文的重点。
客户端同学在参与ReactNative的技术开发中,一般有两种角色:
- 端能力支持
如框架封装,Native组件开发,更多是补充能力的定制开发,和前端并直接不相关
- 前端业务支持
利用JavaScript进行业务需求的开发,需要具备前端开发能力
由于技术栈的差异,RN的业务大多数业务还是由前端FE在开发。对当客户端RD来说,两个角色都参与过后,才能说具备了ReactNative开发能力。
需求目标
以业务为出发是技术掌握的绝佳方式,基于此,我们把一些配置页面进行重构。 下面先看一下两个效果图:
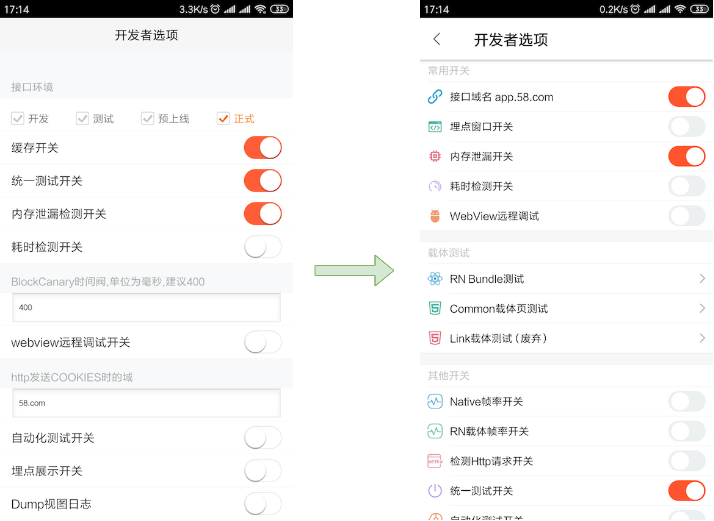
直观来看没有什么大区别,肉眼也区分不出那个的React实现的。第一个图是纯客户端实现的, 第二个略花哨的是React Native实现的
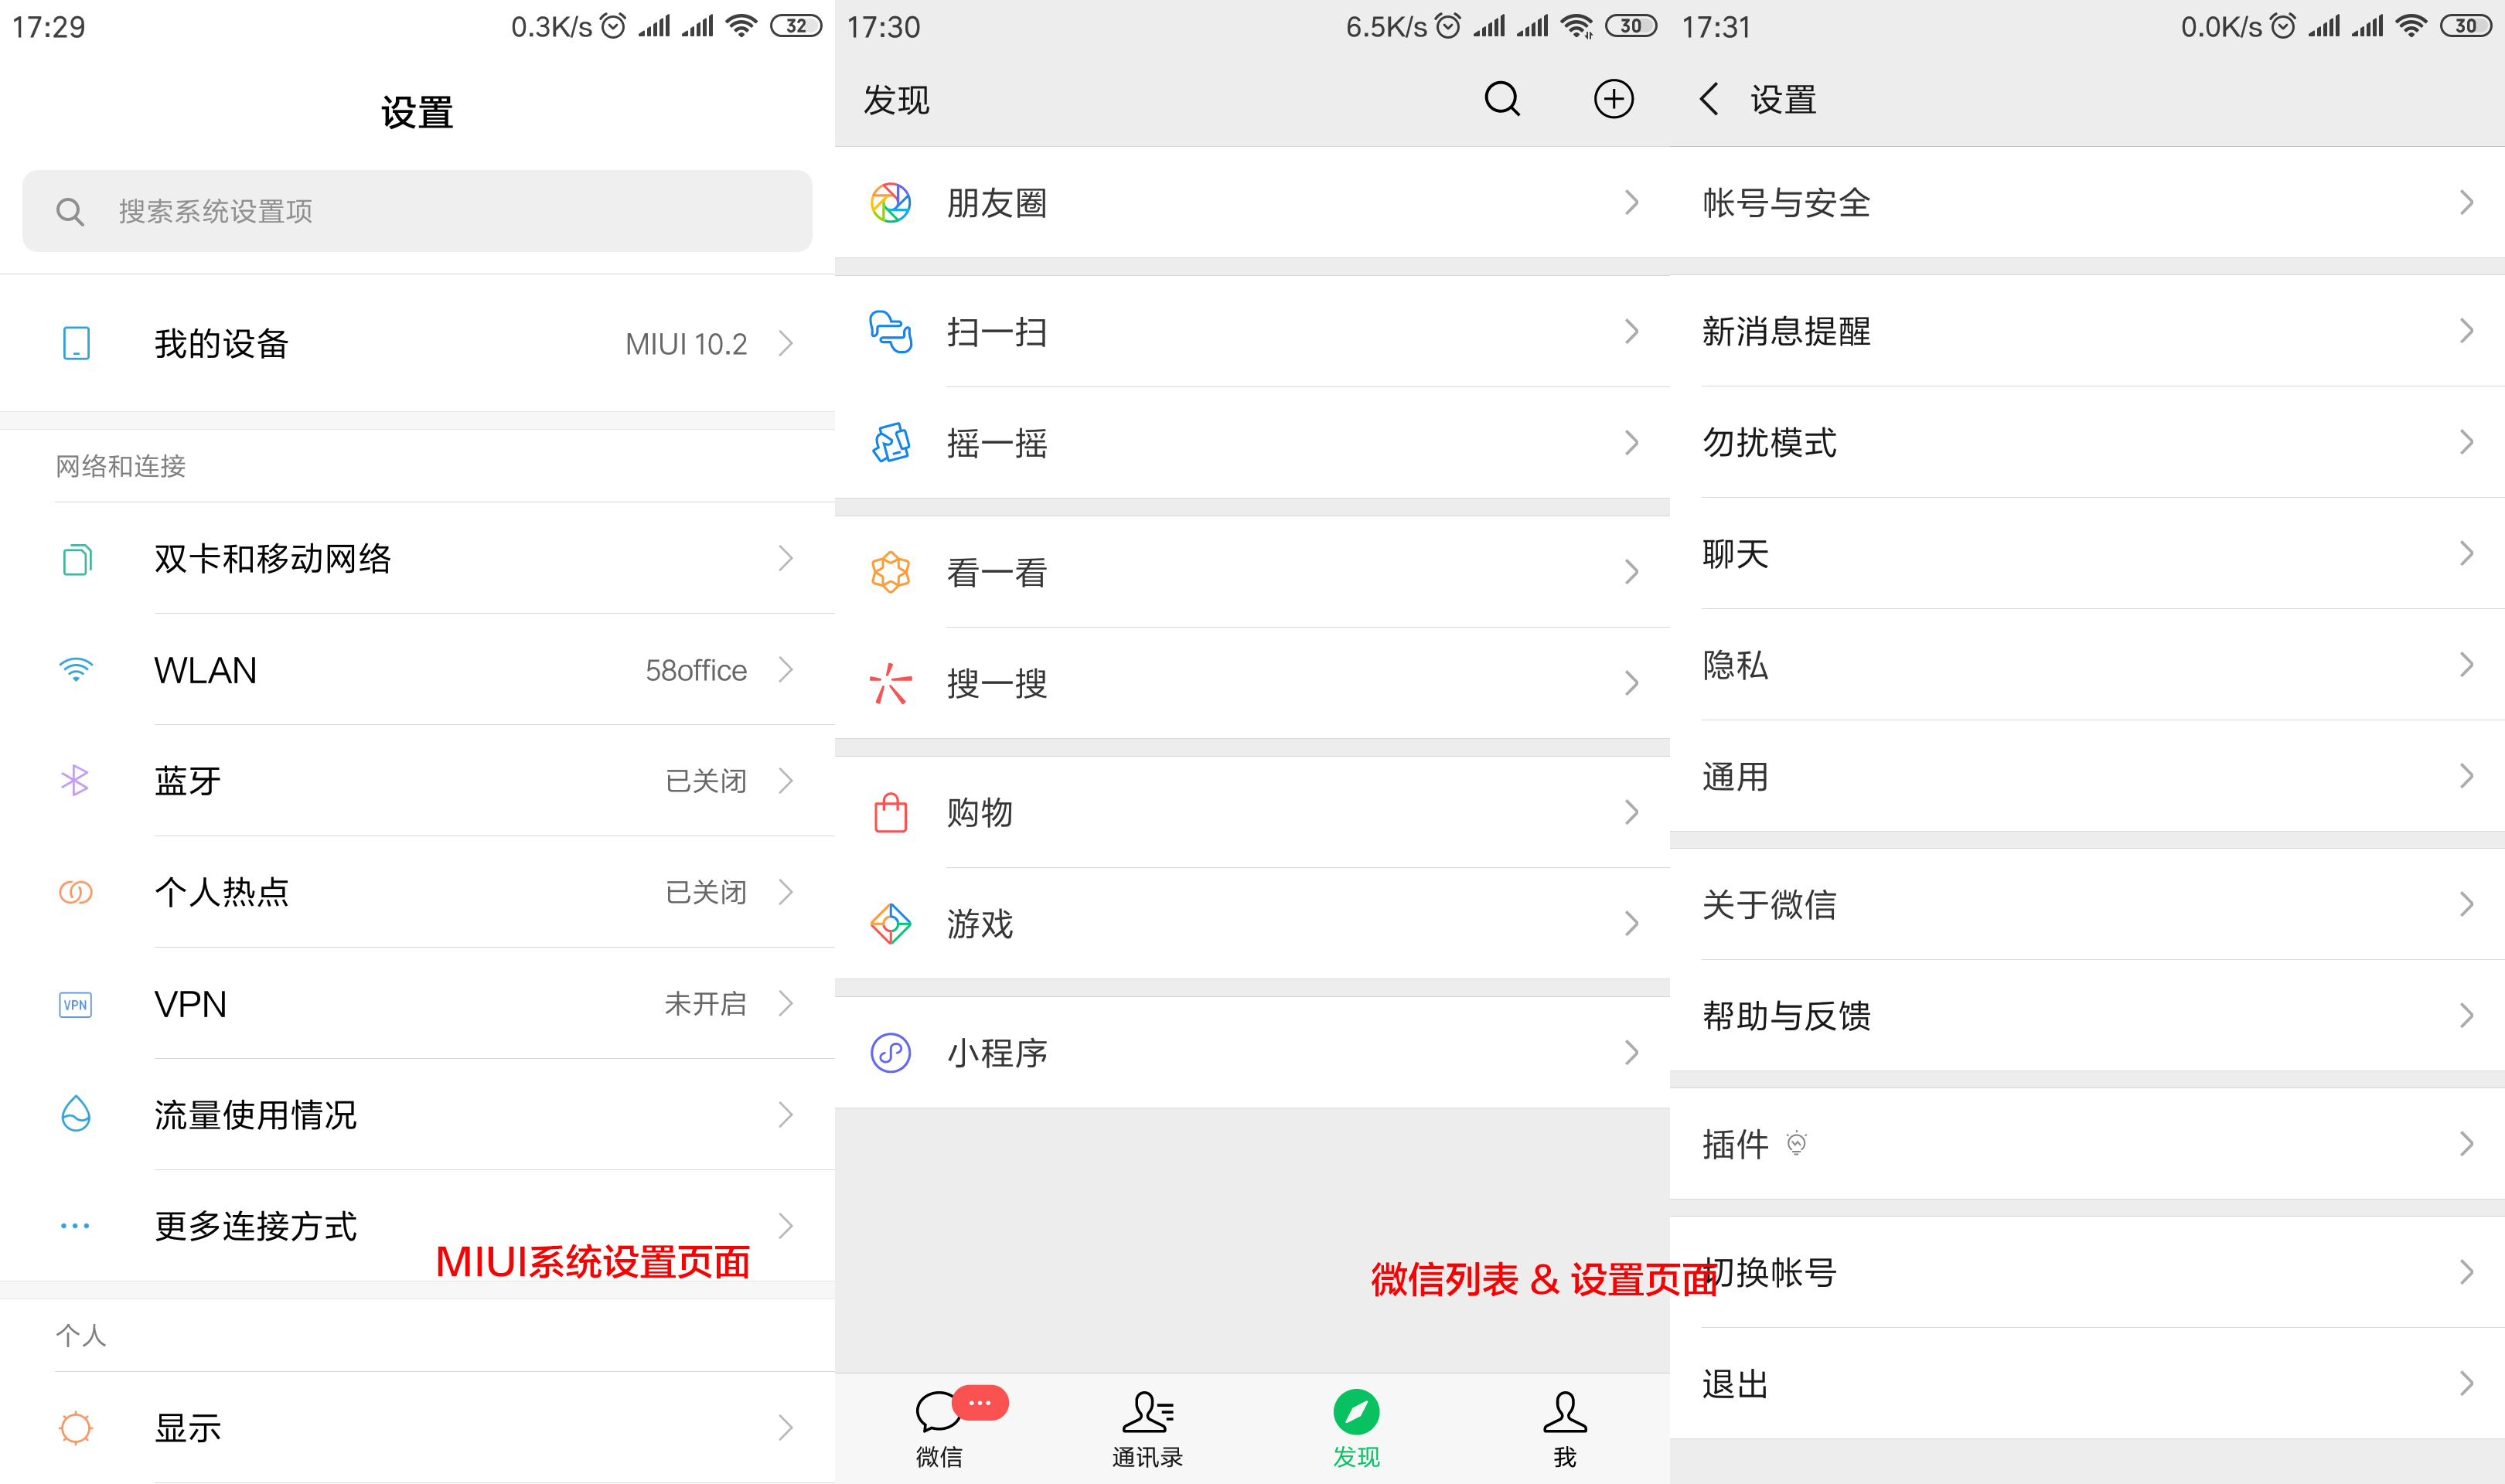
配置页面是一种很常见的页面,参考了下,发现目前国内各大系统和App都倾向于半划线风格。
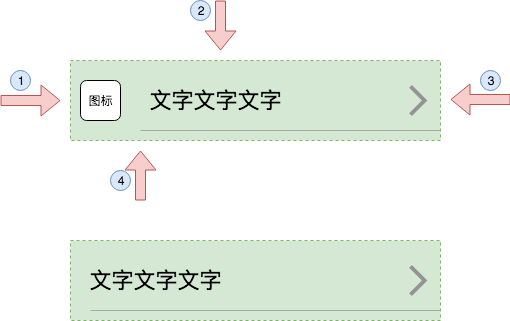
这一组的风格可以可归纳为下面一个原型:
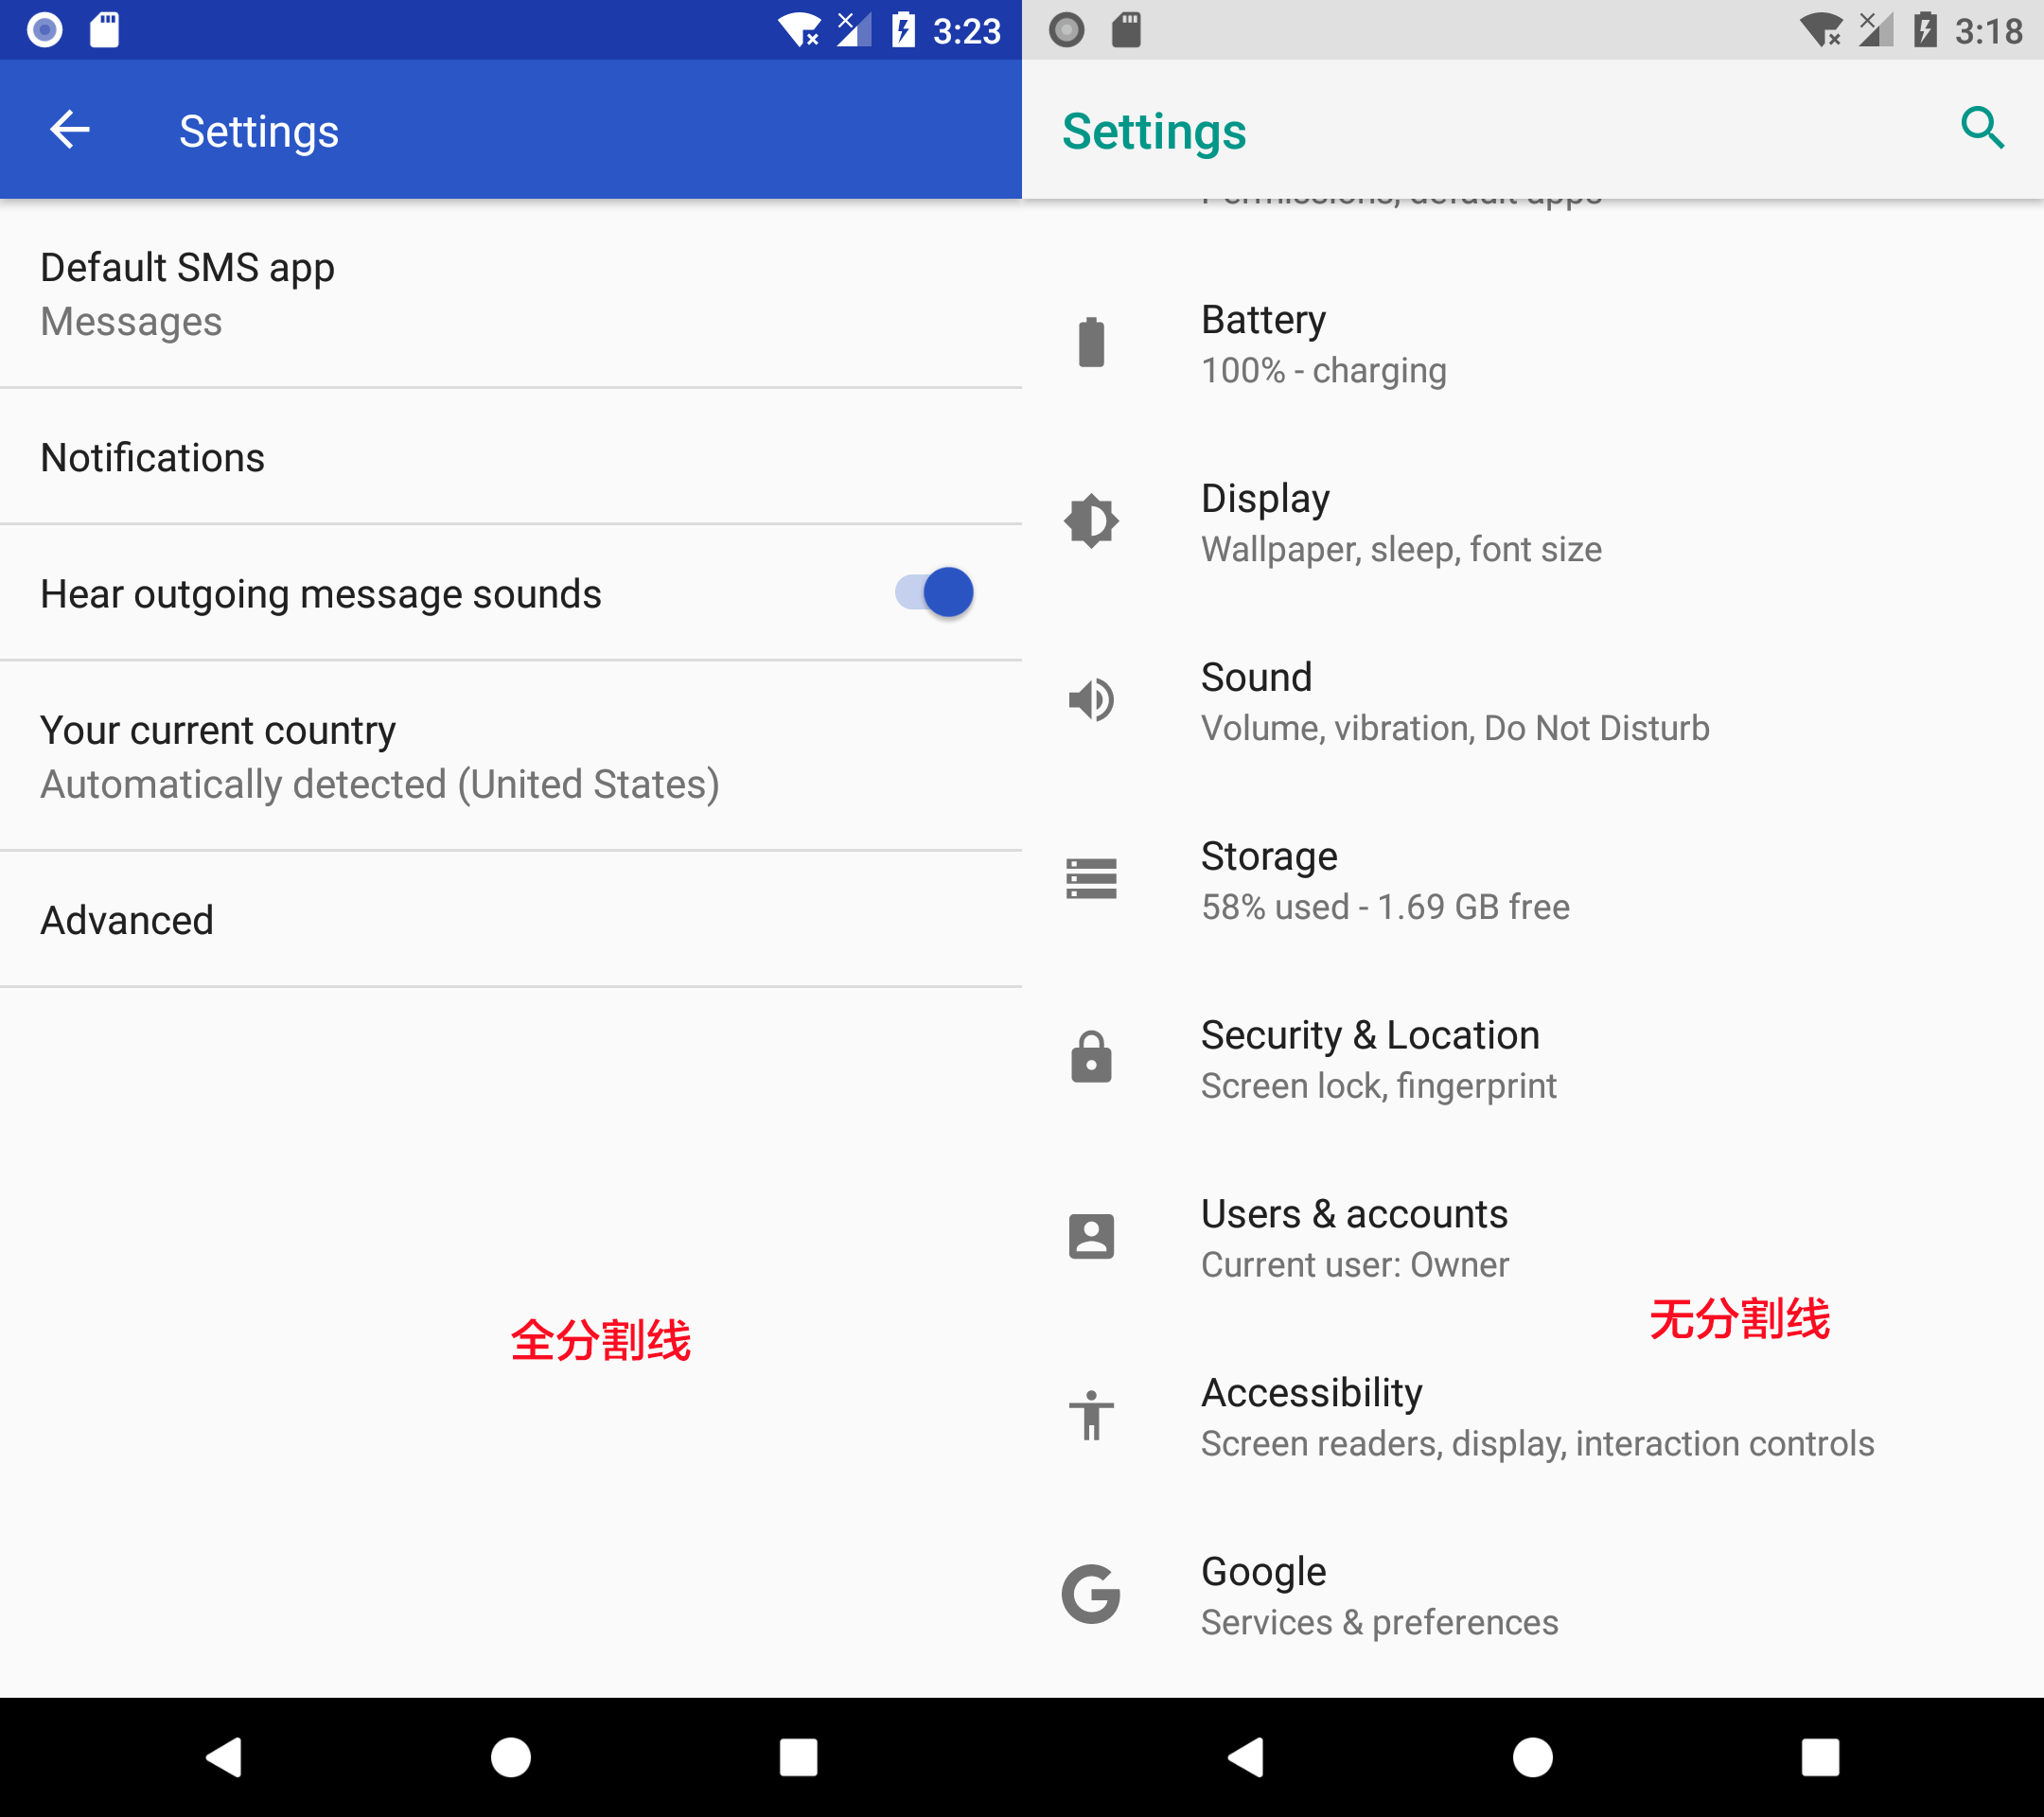
除此之外还有很多其他风格,比如Google的原生风格是偏向于列表没有分割线,全分割线。
实践开发
在开发过程中遇到了一些问题,记录在这里。
全文讨论是基于
React Native 0.57,react-navigation 2.x
单页面&多页面
在开发中很快就会涉及到多页面的问题,特别是设置页面,一级页面往往是顶级入口,为了支持多页面,我们需要引入react-navigation 来实现页面导航管理,比如入栈,导航,出栈,传参。这些都是基本能力,更多高级API和用法可以参考项目官网。

设置页面往往比较单调/相似,根据实际情况,可以封装一些通用组件,给到各个页面使用。
比如前面我们一同分析并提取了一个列表内一行所具备的基本信息和排版结构,这个视图就可以封装成独立的组件。
class SimpleItemView extends React.Component {
    static propTypes = {
        // ...
    }

    static defaultProps = {
        // ...
    }

    render() {
        let source = this.props.imageSource;
        let divider = this.props.divider;
        if (!divider) {
            divider = <Divider/>
        }
        return <TouchableHighlight
            onPress={this.props.onPress}>
            <View>
                <View style={styles.itemContainer}>
                    {source && <Image style={sharedStyles.itemIcon} tintColor={this.props.imageTintColor} source={source} />}
                    <Text style={sharedStyles.itemText}>{this.props.text}</Text>
                    {this.props.showRightArrow && <View style={styles.arrowIcon}>
                        <RightTriangleIcon />
                    </View>}
                </View>
                {divider}
            </View>
        </TouchableHighlight>
    }
}
const styles = StyleSheet.create({
   // ...
});

export default SimpleItemView
类似的还有待开关的组件和标题组件等等。
导航之返回事件
在Android设备上,除了导航条上的返回按钮,一般还有一个物理返回键(全面屏手势等同效果)。当引入了react-navigation之后,我们有了多页面,所以必然要管理页面栈,对native来说,这些页面都是在一个载体内。
为了达到我们的目标,需要在路由表内每个页面都实现各种的返回监听处理。
在WubaRN内,提供了一套包装后的返回监听,可以处理相似的事情,但是特别要注意,事件监听不能混用。react-native本身提供的BackHandler可以做返回拦截。
export type BackPressEventName = "hardwareBackPress";
/**
 * Detect hardware back button presses, and programmatically invoke the
 * default back button functionality to exit the app if there are no
 * listeners or if none of the listeners return true.
 * Methods don't have more detailed documentation as of 0.25.
 */
export interface BackHandlerStatic {
    exitApp(): void;
    addEventListener(eventName: BackPressEventName, handler: () => void): NativeEventSubscription;
    removeEventListener(eventName: BackPressEventName, handler: () => void): void;
}
如果你的页面出现了一次返回事件被触发两次,那么很有可能是两套封装引起的,解决办法是查阅相伴各自封装的实现,或者直接使用官方API。
HOC高阶组件
在开发React项目的时候,一定遇到过很多高阶组件,比如withStyle, withWidth, withNavigation, withOrientation,这个看起就是一个方法的API的在开发中缺大有用处。
export default function withNavigation(Component) {
  class ComponentWithNavigation extends React.Component {
    static displayName = `withNavigation(${Component.displayName ||
      Component.name})`;

    render() {
      const navigationProp = this.props.navigation;
      return (
        <NavigationConsumer>
          {navigationContext => {
            const navigation = navigationProp || navigationContext;
            invariant(
              !!navigation,
              'withNavigation can only be used on a view hierarchy of a navigator. The wrapped component is unable to get access to navigation from props or context.'
            );
            return (
              <Component
                {...this.props}
                navigation={navigation}
                ref={this.props.onRef}
              />
            );
          }}
        </NavigationConsumer>
      );
    }
  }

  return hoistStatics(ComponentWithNavigation, Component);
}
观察这个样例,可以分析出他的核心思想:
- 导出一个工具方法,传入的原始组,返回包装组件
- 没有继承关系,包装组件通过
render()渲染原始组件,透传属性,和新增属性,如navigation
在项目中,可以用于提供诸如个性化导航栏,返回键等等。
React图片使用困惑
在开发React的时候,图片使用并没有什么特殊之处,但是在React Native中却不是这样,刚开始写的时候有没有过下面的困惑:
Debug开发时图片都显示正常,Bundle之后怎么图片显示不出来?
这个其实和Bundle打包有关,打包不会把图片,比如png打入bundle.js中,但是可以通过指定--assets-dest参数,自动把用到的图片拷贝到指定目录:
也就是说,机制和原生一样,还是需要把图片放到Android工程内。
bundle支持的参数可以参考:./bundleCommandLineArgs.js
/**
 * Copyright (c) 2015-present, Facebook, Inc.
 *
 * This source code is licensed under the MIT license found in the
 * LICENSE file in the root directory of this source tree.
 *
 * @format
 */

'use strict';

module.exports = [
  {
    command: '--entry-file <path>',
    description:
      'Path to the root JS file, either absolute or relative to JS root',
  },
  {
    command: '--platform [string]',
    description: 'Either "ios" or "android"',
    default: 'ios',
  },
  {
    command: '--transformer [string]',
    description: 'Specify a custom transformer to be used',
  },
  {
    command: '--dev [boolean]',
    description: 'If false, warnings are disabled and the bundle is minified',
    parse: val => (val === 'false' ? false : true),
    default: true,
  },
  {
    command: '--minify [boolean]',
    description:
      'Allows overriding whether bundle is minified. This defaults to ' +
      'false if dev is true, and true if dev is false. Disabling minification ' +
      'can be useful for speeding up production builds for testing purposes.',
    parse: val => (val === 'false' ? false : true),
  },
  {
    command: '--bundle-output <string>',
    description:
      'File name where to store the resulting bundle, ex. /tmp/groups.bundle',
  },
  {
    command: '--bundle-encoding [string]',
    description:
      'Encoding the bundle should be written in (https://nodejs.org/api/buffer.html#buffer_buffer).',
    default: 'utf8',
  },
  {
    command: '--max-workers [number]',
    description:
      'Specifies the maximum number of workers the worker-pool ' +
      'will spawn for transforming files. This defaults to the number of the ' +
      'cores available on your machine.',
    parse: (workers: string) => Number(workers),
  },
  {
    command: '--sourcemap-output [string]',
    description:
      'File name where to store the sourcemap file for resulting bundle, ex. /tmp/groups.map',
  },
  {
    command: '--sourcemap-sources-root [string]',
    description:
      "Path to make sourcemap's sources entries relative to, ex. /root/dir",
  },
  {
    command: '--sourcemap-use-absolute-path',
    description: 'Report SourceMapURL using its full path',
    default: false,
  },
  {
    command: '--assets-dest [string]',
    description:
      'Directory name where to store assets referenced in the bundle',
  },
  {
    command: '--verbose',
    description: 'Enables logging',
    default: false,
  },
  {
    command: '--reset-cache',
    description: 'Removes cached files',
    default: false,
  },
  {
    command: '--read-global-cache',
    description:
      'Try to fetch transformed JS code from the global cache, if configured.',
    default: false,
  },
];
又或者直接使用url形式的在线图片,这个就体验比较差了,会导致图片加载显示缓慢,只适合用于动态的内容图片,像内置的icon图标理想情况下内置展示最快。
查询官方文档,寻找解决思路Image。
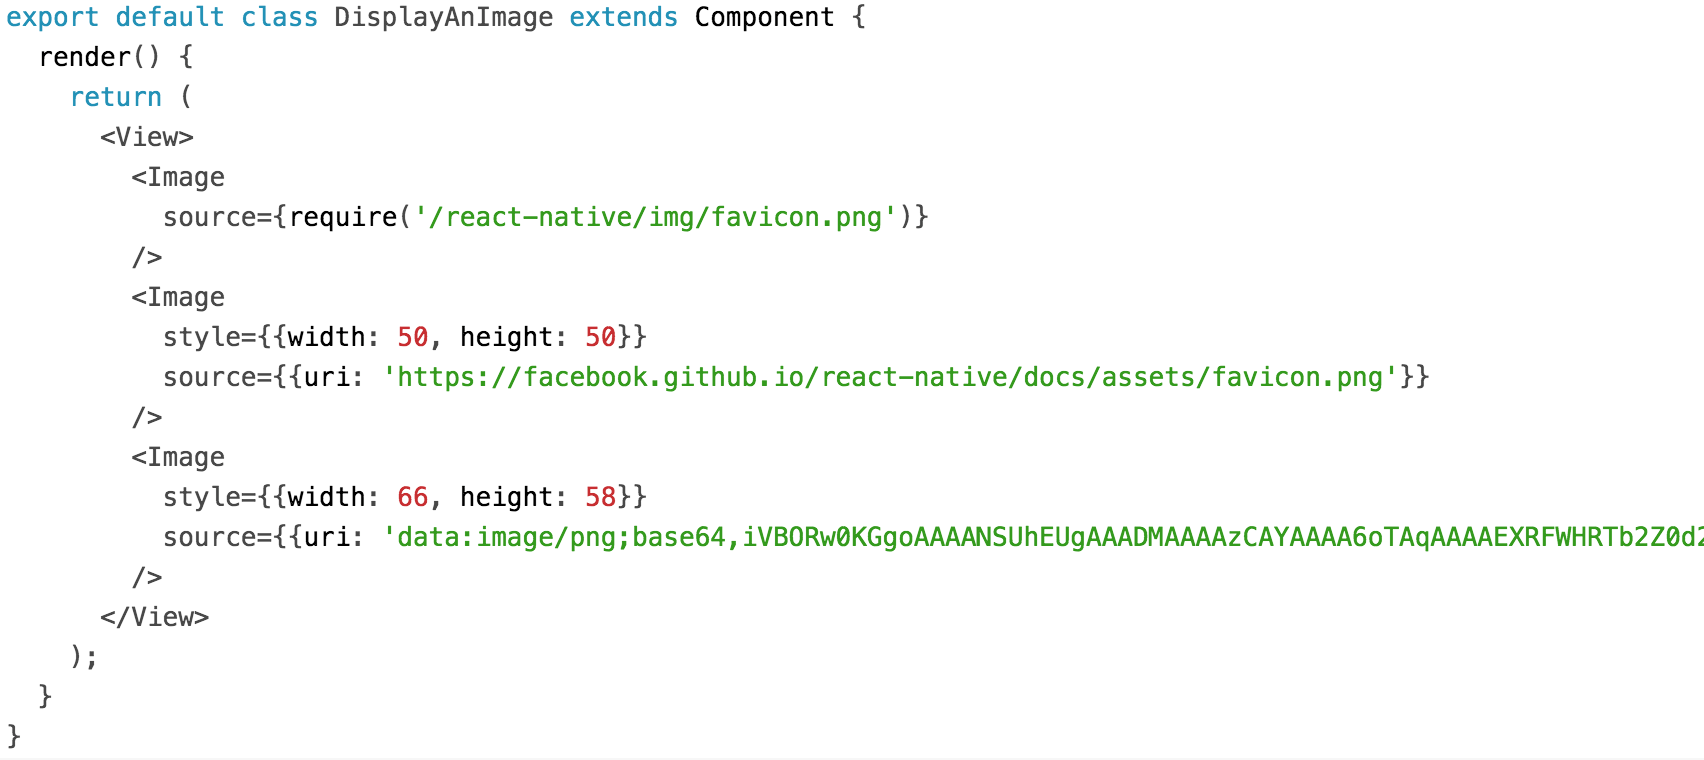
RN支持的三大图片加载方式:
- 内置图片
- 载体URL图片
- base64编码格式
在我们的设置页面中,有较多小图标,原来采用的是内置图片形式,因此调用部分都是require(),现在如果要改成base64,需要解决两个问题:
- 如果包装直观性,图片可预览修改,而对App业务逻辑无感知
- 如何自动替换:不可能手工去书写每一个base64调用
由于require是编译期的替换,必须牢记,图片不能像native一样通过变量传递。
针对两处问题,我们的解决方案非常简单,开发一个nodejs脚本,实现每张png自动转base64编码,并自动生成对应的配置代码。
增加一个脚本配置png2base64:
"scripts": {
  "start": "node node_modules/react-native/local-cli/cli.js start",
  "png2base64":"node scripts/png2base64.js",
},
实现编码生成
const fs = require('fs');

function base64(file) {
    var bitmap = fs.readFileSync(file);
    let encodeString = new Buffer(bitmap).toString('base64');
    return `data:image/png;base64,${encodeString}`;
}

function saveJson(des, data) {
    fs.writeFile(des, JSON.stringify(data, null, 2), (err) => {
        if (err) {
            console.error(err);
            return;
        };
        console.log("File has been created");
    });
}
console.log('convert png icon to base64 format')
const files = fs.readdirSync('App/assets/');
const output = {};
const folder = 'App/assets';

files.filter((it) => {
    return it.toLowerCase().endsWith('.png')
}).forEach(file => {
    const encode = base64(`${folder}/${file}`);
    output[file] = { name: file, uri: encode }
});
console.log('all png encoded', output);

saveJson('App/assets/base64_png.json', output);
console.log('json saved');
这样最简单的需求就实现了,每次有内置图片的增,删,改时,执行一次脚本即可生成最新配置。
在项目内调用的时候,简单封装API,保持和原生写法类似,如原来通过require实现内置调用,现在通过Icons.require调用,代码区别只新增了一个前缀,替换起来非常简单。
小结
总的来说,RN开发速度非常快,但是排查问题往往比较困难,比如要界定问题是出在Native还是React,还是其他书写问题。