Flutter嵌套刷新填坑
2019-11-25 小文字
接上文,我们解决了Flutter吸顶位置优化,本文看一下怎么让我们的界面支持下拉刷新。
NestedScrollView下拉刷新
Flutter提供了一个RefreshIndicator控件,可以为我们的列表添加SwipeRefresh效果。
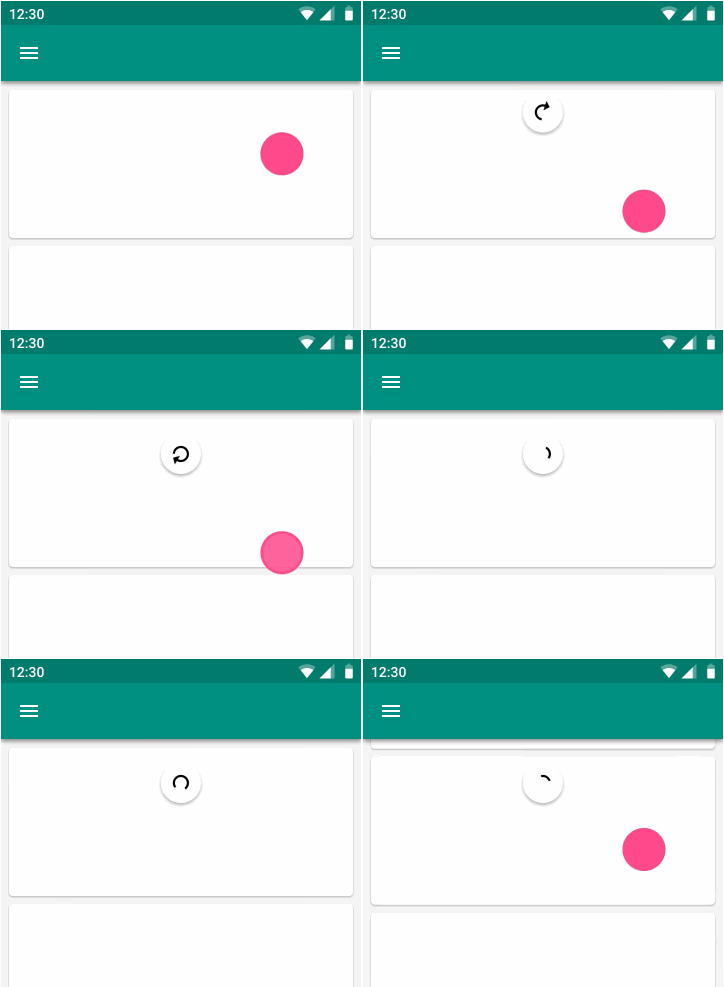
这个控件可以和ScrollView,ListView,GridView配合在一起失效标准的下拉刷新交互。然而他却不能和NestedScrollView愉快相处。同样Github上高星的几个刷新库同样不支持。😂
为了使我们的交互达到一拖N的交互,我们采用了Sliver高阶组件,
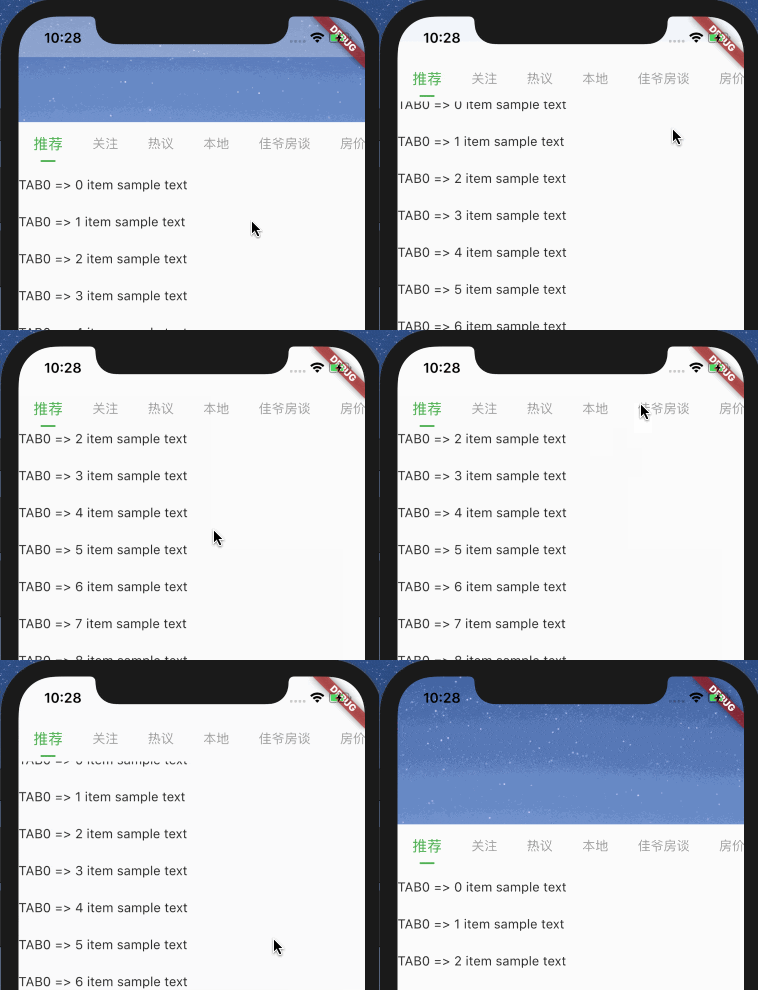
由此引入了NestedScrollView。
RefreshIndicator源码修改
为了让RefreshIndicator支持NestedScrollView,需要对其内部逻辑进行调整。比如RefreshIndicator会判断Notification来决定是否响应一个滑动事件:
/// A check that specifies whether a [ScrollNotification] should be
/// handled by this widget.
///
/// By default, checks whether `notification.depth == 0`. Set it to something
/// else for more complicated layouts.
final ScrollNotificationPredicate notificationPredicate;
这个notificationPredicate事可选参数,默认值如下:
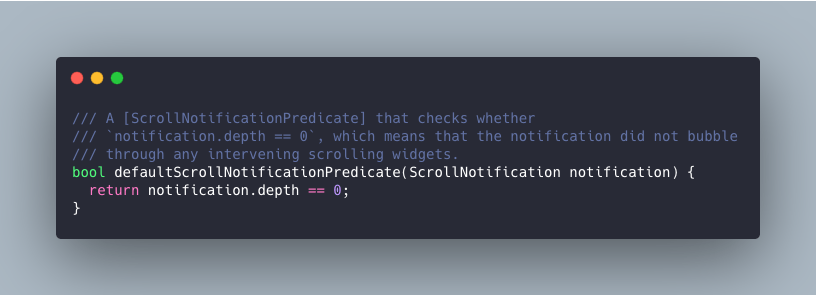
我们可以尝试将判断放宽松,通过传入指定的判定函数:
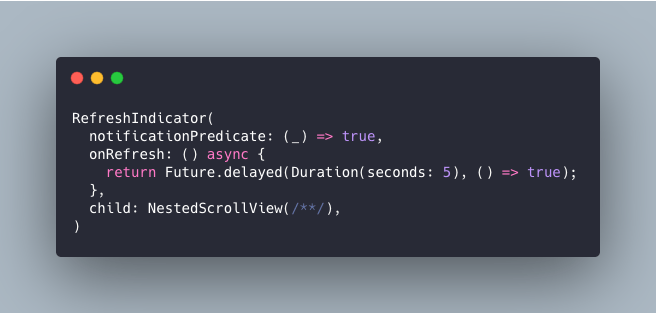
这样就可以让刷新控件支持NestedScrollView了。另外可以根据测试情况做一些优化,比如针对滑动区和滚动问题
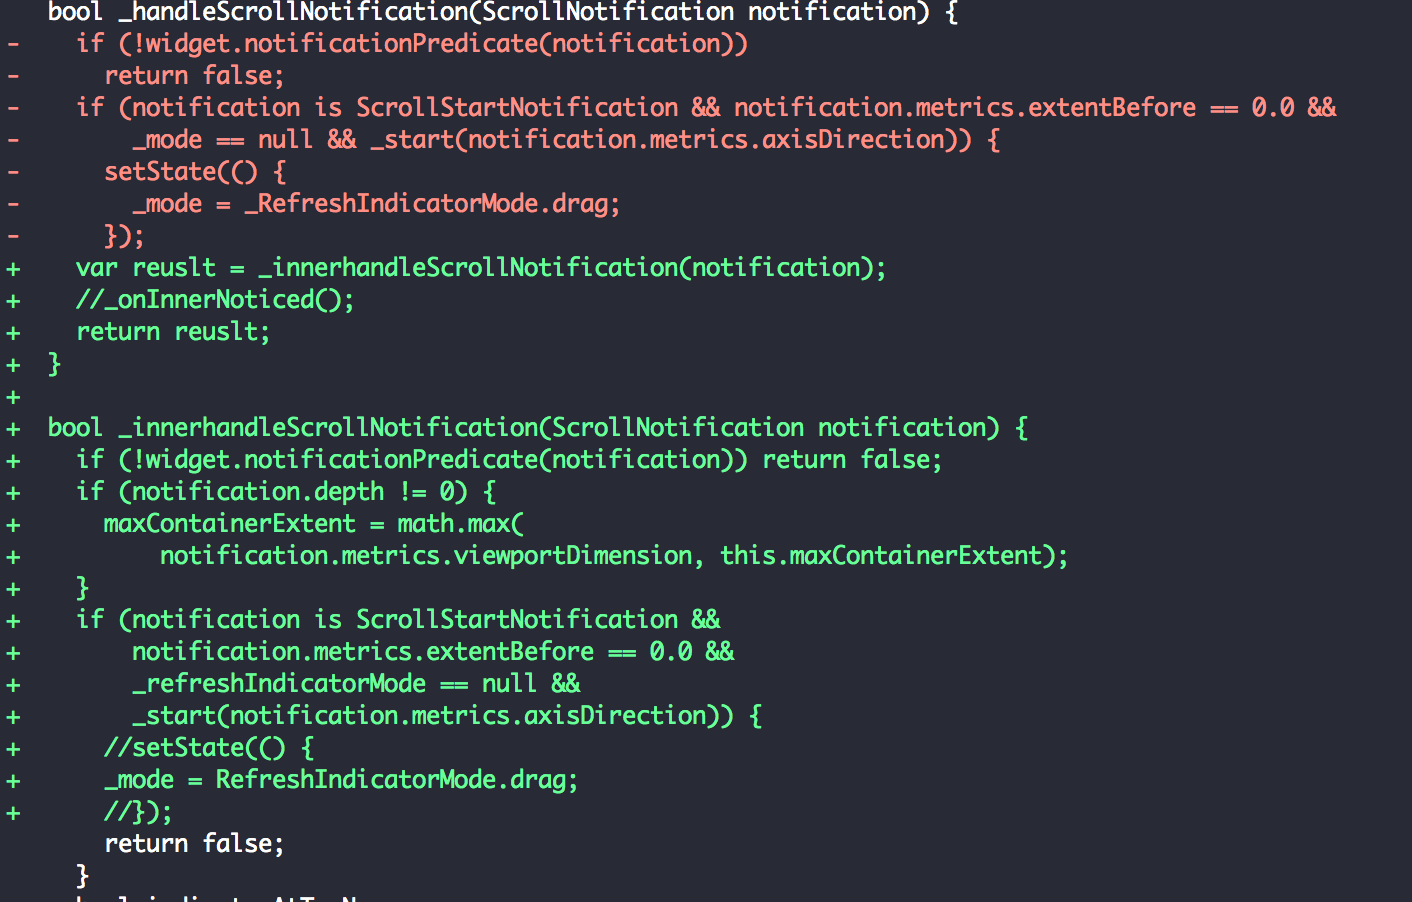
详细可以参考这篇文章=>https://juejin.im/post/5beb91275188251d9e0c1d73。
RefreshIndicator刷新实现
通过修改RefreshIndicator的源码,可以实现对刷新控件的支持。但是这个刷新的效果一般都不是我们需要的,因此需要想办法再做一些调整来定制刷新的头部效果。
如果分析过源代码,会发现在很多的刷新Header部分都是通过偏移来解决的,在Flutter里面,可以利用Stack+Position+top来控制一个视图的相对偏移位置。也就是默认我们把刷新的Header偏移到屏幕的上边缘之外,然后滑动的手展示出来。
话这是么说,但是完整实现起来还是需要结局很多细节问题的。
RefreshIndicator的大概思路也差不多是这样。

我们省略了一些构建代码,可以看到这里使用的是padding,结合displacement来控制最终刷新按钮的停留位置,注意这个不等于最大滑动位置。二是滑动松手后回弹的停留位置的差值。
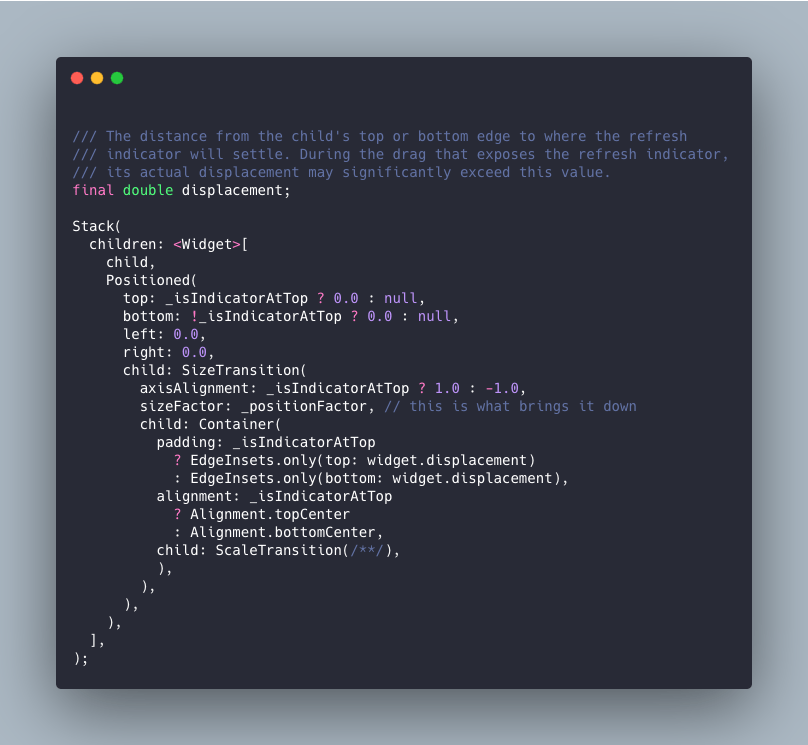
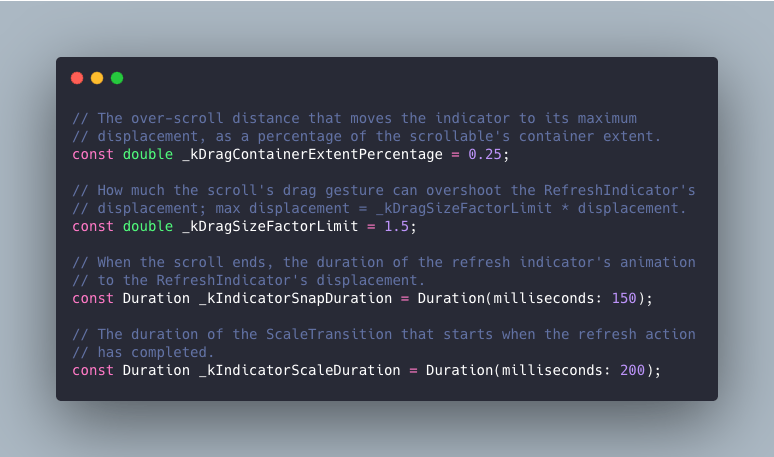
滑动的最大位置是根据比例系数计算的,可看到如下公式:
max displacement = _kDragSizeFactorLimit * displacement
改造刷新控件
在了解了刷新的逻辑后,我们可以基于这个代码进行二次开发,主要是复用滑动等唯一判定逻辑,但是把最后展示的空间替换掉即可。
直接把前面看到的Stack部分去除,只返回外部传入的child,即NestedScrollView,然后刷新的头部由NestedScrollView自行绘制。
@override
Widget build(BuildContext context) {
  assert(debugCheckHasMaterialLocalizations(context));
  final Widget child = NotificationListener<ScrollNotification>(
    key: _key,
    onNotification: _handleScrollNotification,
    child: NotificationListener<OverscrollIndicatorNotification>(
      onNotification: _handleGlowNotification,
      child: widget.child,
    ),
  );
  return child;
}
那么NestedScrollView的子Sliver怎么和外部控制器关联起来呢?毕竟下拉的各种状态量都是在控制器中的。答案是根据上下文获取。
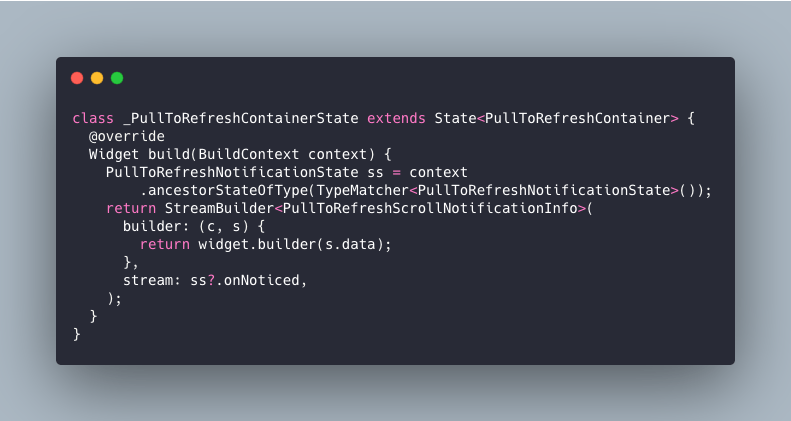
注意,这段代码虽然短小,但是没有一点废话。可以看到ancestorStateOfType这个方法,他能从上下文中获取最近的一个State,并且类型符合传入的泛型。初看这段代码,简直是神来之笔。
PullToRefreshNotificationState ss = context
    .ancestorStateOfType(TypeMatcher<PullToRefreshNotificationState>());
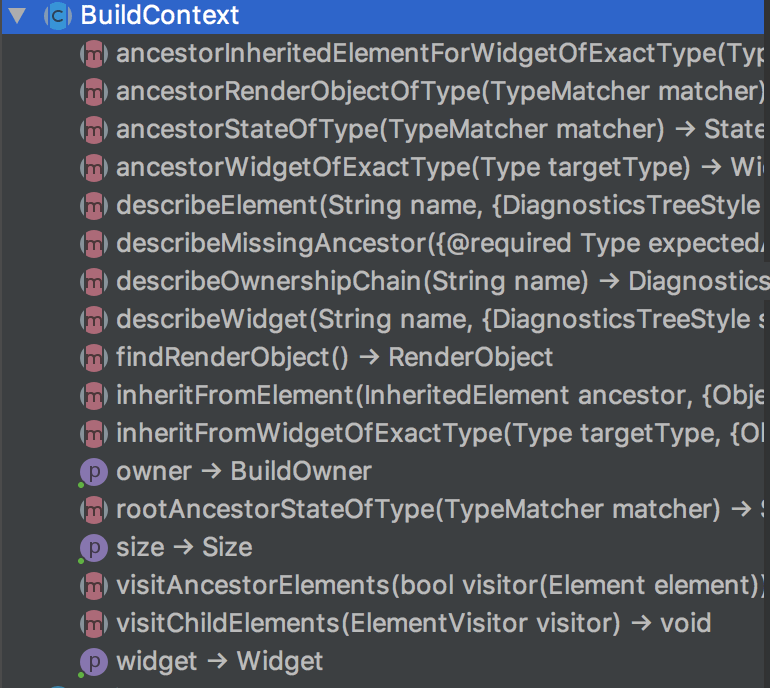
类似的通过context来获取对象的方法还有很多
剩下的就是通过StreamBuilder返回了一个stream流,它能够自驱动的不断触发自身的build过程,也就是说,只有我们把手势的拖拽动作所产生的偏移量不断的注入到Stream中,我们就可以不断地触发build刷新header视图。
final _onNoticed =
  new StreamController<PullToRefreshScrollNotificationInfo>.broadcast();
Stream<PullToRefreshScrollNotificationInfo> get onNoticed =>
  _onNoticed.stream;
通过调用链可以看到stream和手势偏移量的链接如下:
void _onInnerNoticed() {
if ((_dragOffset != null && _dragOffset > 0.0) &&
    ((_refreshIndicatorMode == RefreshIndicatorMode.done &&
            !widget.pullBackOnRefresh) ||
        (_refreshIndicatorMode == RefreshIndicatorMode.refresh &&
            widget.pullBackOnRefresh) ||
        _refreshIndicatorMode == RefreshIndicatorMode.canceled)) {
  _pullBack();
  return;
}

if (_pullBackController.isAnimating) {
  pullBackListener();
} else {
  _onNoticed.add(PullToRefreshScrollNotificationInfo(_refreshIndicatorMode,
      _notificationDragOffset, _getRefreshWidget(), this));
}
}
下面是从滑动的监听器到Stream的分发链路:
NotificationListener=》onNotification=》_handleScrollNotification=》_innerhandleScrollNotification=》_checkDragOffset=》_refreshIndicatorMode=》_onInnerNoticed=》_onNoticed=》Stream
自定义刷新
通过上述的封装,成功的把下拉刷新的header视图转移到了外部Sliver上面。在实现Sliver时便只需要根据需求,定制UI。 核心判断逻辑都是基于滑动的状态来做的。
class PullToRefreshScrollNotificationInfo {
  final RefreshIndicatorMode mode;
  final double dragOffset;
  final Widget refreshWiget;
  final PullToRefreshNotificationState pullToRefreshNotificationState;
  PullToRefreshScrollNotificationInfo(this.mode, this.dragOffset,
      this.refreshWiget, this.pullToRefreshNotificationState);
}
关于如何实现请参考https://juejin.im/post/5bebcc44f265da61682aedb8
参考
- https://github.com/fluttercandies/pull_to_refresh_notification/blob/master/README-ZH.md
- https://juejin.im/post/5beb91275188251d9e0c1d73
- https://juejin.im/post/5bebcc44f265da61682aedb8
- https://stackoverflow.com/questions/51119795/how-to-remove-scroll-glow